Feature to have the address to auto-complete the zip code based on your location database is available with the Premier/Enterprise or the Experience add-on
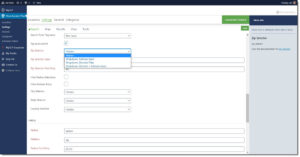
When 2 or more characters are typed in the address input box, input suggestions based on location data will appear.
None (default) – do not suggest address input.
Zipcode – suggest matching zip codes.
With Premier or SLP SaaS Enterprise you can also have a zip code drop down selector
If the formatting of the autocomplete is not the way you would like it to appear, reset the Search Form Style under appearance layout.
Locator Styling determines how the auto-complete drop down box will appear on your page.
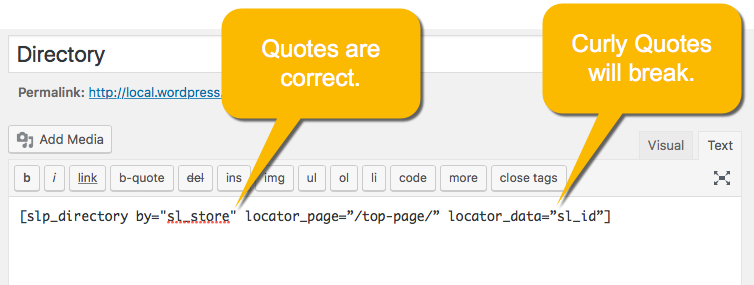
WordPress blog posts likes to use curly quotes instead of straight quotes whenever you write an article. Our documentation site is built on WordPress which means many of our articles are replaced any quotes we type in an article with curly quotes.
The problem is that the WordPress shortcode processor does NOT like curly quotes. If you use curly quotes in a shortcode attribute such as [slp_directory by=”city”] and those quotes are “curly”, WordPress treats the quotes as a plain-old alphabetic character just like the C-I-T or Y in “city”. In other words WordPress things you mean “by quote-city-quote” not “by city”.
Why is that an issue?
If you copy-and-paste most examples from this documentation site WordPress will copy the “pretty curly quotes” into your shortcode. If you paste that into your WordPress page it breaks.
Straight versus curly quotes when pasted into a page.
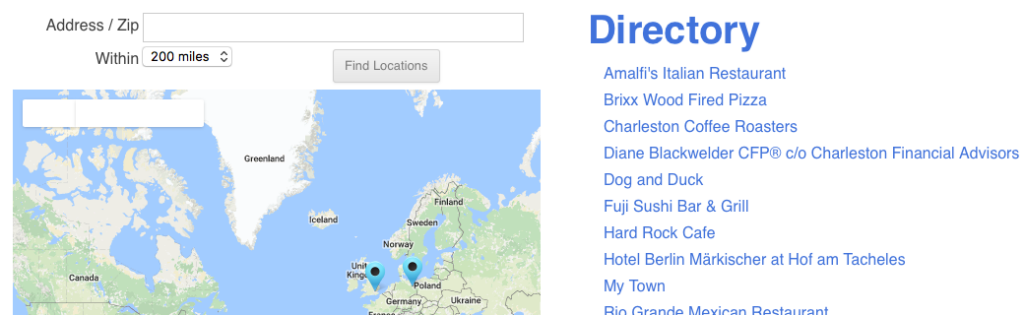
An example of how this can impact Store Locator Plus can be seen from my example where I pasted the slp_directory shortcode directly from the docs site into my test site. I get an invalid data query because WordPress added curly-quotes to my data field name. The SLP database does not have a field name quotesl_storequote but does have a field named sl_store.
The fix?
Make sure you re-type each quote manually. Typing the ” in your blog instead of copy-and-paste will ensure you are getting “straight quotes” in your shortcode attributes not curly quotes.
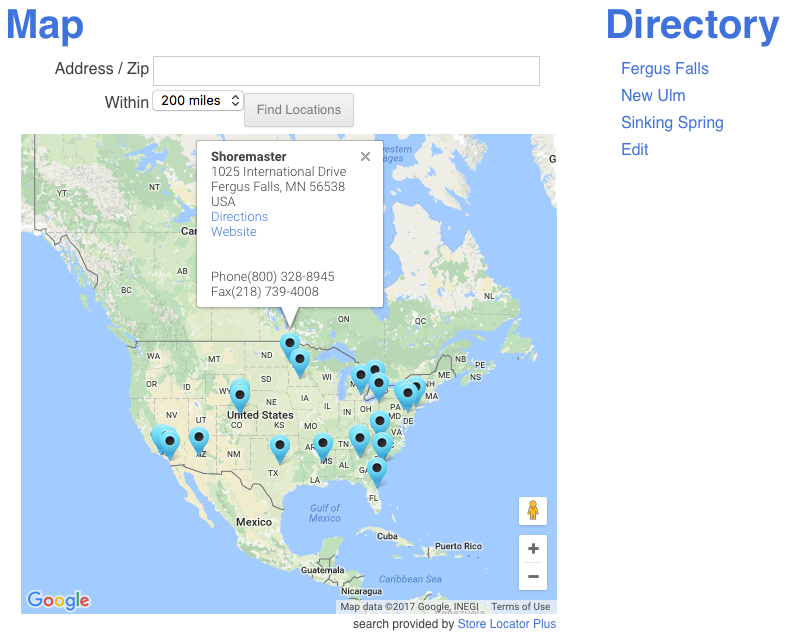
This is how the example looks now that the curly quotes have been replaced with straight quotes.
When the URL Control module is active you can enable location ID passing by turning on “Location Selection” under the General / User Interface tab.
When this is enabled you can pass in a location ID by adding ?location=<id> to the end of the page address where your locator map is deployed with the [slplus] shortcode.
When the location ID is present and the settings is enabled the specified location will be activated on the location map as if a user had clicked the marker on the map. This will show the info bubble by default.
Note:If cluster map markers are enabled they will be turned off for the initial page load. Subsequent input or searches by the user will re-activate the cluster map markers.
Note: When passing in a location ID via a URL the location latitude/longitude will become the center point for the map display. The location that is shown will be at the top of the result listing if sort by distance (default) is in place.
Location Limit
When the URL Control module is active you can enable location ID passing by turning on “Location Limit” under the General / User Interface tab.
When this is enabled you can pass in a limit for the number of locations to be returned when the map initially loads and when a search is performed by adding ?limit=<id> to the end of the page address where your locator map is deployed with the [slplus] shortcode.
Filter By Tag
When the URL Control module is active you can filter locations to show only this matching the tag(s) by turning on “Filter By Tag” under the General / User Interface tab.
This setting will require the Power Add On to be installed and active.
This setting will also require the following shortcode to be present in the Results Layout. The shortcode is standard in most Store Locator Plus provided Style Gallery Styles. It can be removed or changed if you have the Experience Add On active.
[slp_search_element selector_with_label="tag"]
An example of a Results Layout where locations are assigned a single tag. With multiple tags the entire list will be hyperlinked and will not likely perform as expected. Note the [slp_location data.sl_tags] takes the place of the [slp_location pro_tags] shortcode that is set by default on most Style Gallery styles.
If you have URL controls enabled you can now pass in location filters based on a tag by adding ?only_with_tag=red to the end of your locations page URL.
Combining URL Options
You can combine the URL control options by using standard URL notation for parameter passing.
The standard is to define the first parameter by starting with a question mark.
Additional parameters are started with an ampersand.
To pass a location ID and a location limit, in this example to show ONLY the location specified, you would add ?location=32&limit=1 to your map page URL.
With the Power add-on you will find additional Bulk Actions under the Locations/Manage panel. There is a drop down menu under the Bulk actions tab that can be utilized to remove many, some or all tags associated with the location data. Check off which locations you want to remove the tags from, or you may check off all and select the filter to “Apply to all”
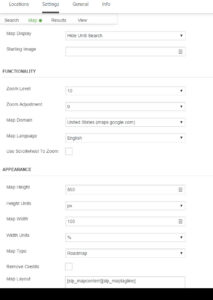
The Experience add-on for the WP Store Locator Plus or the MySLP/Professional Plan allows you to customize the way your Map is displayed and behaves.
With the WPSLP Experience add-on installed and activated go to Settings/Map.
Show Map (default)
Hide map until search
Image until search
Do not autozoom
Full Screen (With WPSLP Experience add-on or Professional level MYSLP)
Appearance
Additional options such as Hide the Map entirely or to change the layout are available with add-ons. (See Map layout and appearance WPSLP Experience Add-on. or if you have purchased the Professional and /or Enterprise level MYSLP SaaS . If you do not have the Add-on or the corresponding MySLP plan, the optional settings will NOT appear. (Note: With MYSLP there is a sidebar menu called Store Locator Plus/Settings where you will find the same. See Adjust Locator styling for more information)
The additional options with the above mentioned plans or add-ons allows you to hide the map , change the map layout, change the map bubble display, and/or hide the map info bubble. The Plugin Style under View (WPSLP) may supersede these settings. Choose one that will compliment your theme or utilizes the add-on features available to you.
Assign categories to your locations that allow users to pick a category and show only those locations. Great for showing service versus retail centers or locations that carry specific products.
Note: Starting in March 2017 you can now pay with a credit card via Stripe. This will not interact in any way with PayPal and allows you to purchase subscriptions on a credit card.
Store Locator Plus subscriptions or add-ons can be purchased with a credit card. To do so go through the normal checkout procedure. When the PayPal login screen appears choose the “Pay with Debit or Credit Card” button on the bottom of the screen. Fill out your details for the credit card information.
This will allow you to make the purchase and have it billed directly to your credit card WITHOUT going through a PayPal account.
If you are getting the message “you do not have sufficient permissions to access this page” when trying to access the “Manage Locations” or “Map Settings” page, but “Add Locations ” is working it is because another plugin is interfering with the submenu management module in WordPress. You will likely find that any plugin that has a separate sidebar menu with multiple entries underneath will only work on the first entry. There is little we can do to remedy the situation without risking breaking other plugins. We suggest deactivating other plugins, one-at-a-time, until you find the plugin causing problems then ask them to rewrite their menu and submenu process and admin panel filters to ensure the basic menu system remains intact.
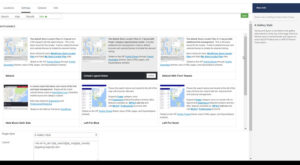
Store Locator Plus allows you to feature specific locations in your search results. This requires the Experience add on (or Premier ) for WordPress or a Professional or Enterprise account for My Store Locator Plus. Some of the interface styles provided by the style gallery support featured location highlighting “out of the box”, such as the Default With Font Tweaks style.
Select A Style That Supports Featured Locations
The Default With Font Tweaks Style is one of the styles that highlights locations and is a good starting point for testing this functionality. You can adjust the layout and styling afterwards to meet your specific design requirements.
WPSLP – Select the Store Locator Plus entry in the side menu.
MYSLP – Select Store Locator Plus in the side menu.
Go to the Settings Tab and select the View subtab.
Click on the activate button on Default With Font Tweaks in the style gallery.