Load locations does not replace the csv file import functionality available to the MySLP Professional or Enterprise level plan subscribers but it can be used to load basic location data from your WordPress Store Locator Plugin (such as WP Store Locator Plus®,) into your SLP SaaS account. (The basic load will not load category tables. You would need to use import csv file for that.)
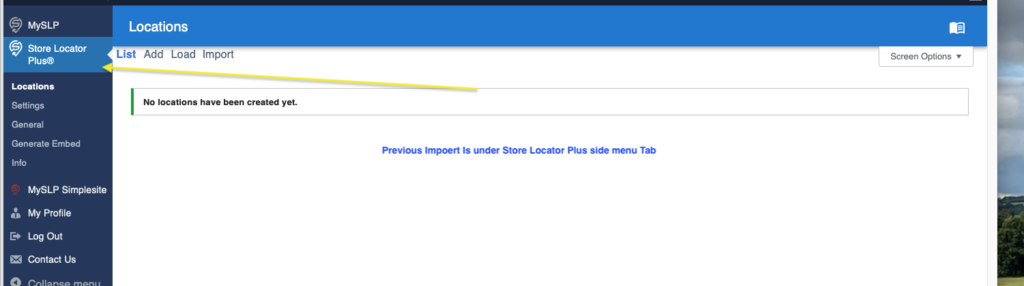
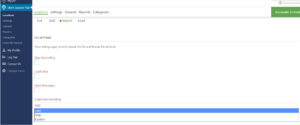
This functionality can be found from the MYSLP account, the SLP sidebar tab and under Locations details as shown in the screenshot below.
The loader supports loading locations from WordPress sites running the WordPress Store Locator Plus plugin. You can attempt to load from other WordPress Locator plug-ins but they might not be in the same format.
If you are using a locator or directory plugin other than Store Locator Plus, please contact us
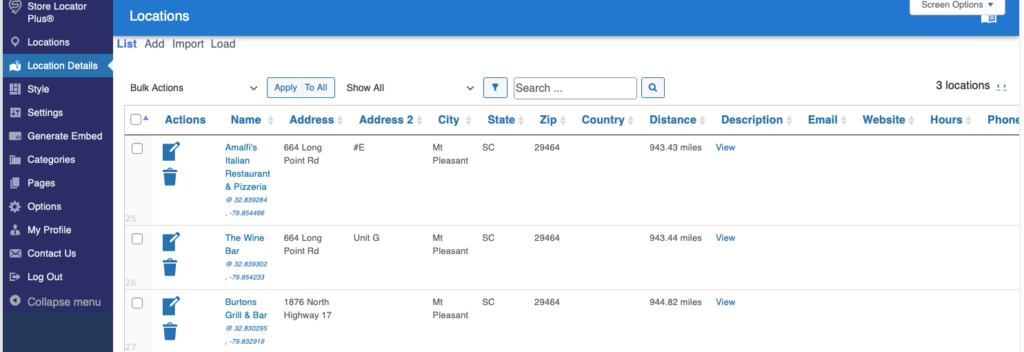
Locations are added to Store Locator Plus® via the sidebar menu via the locations submenu. This option presents a list of all locations along with a menu option to add a location via a web form.
If you have many locations and have either the Power add-on enabled for the plug-in or have signed up for the Professional level plan for the mySLP SaaS you can import them via a CSV import file.
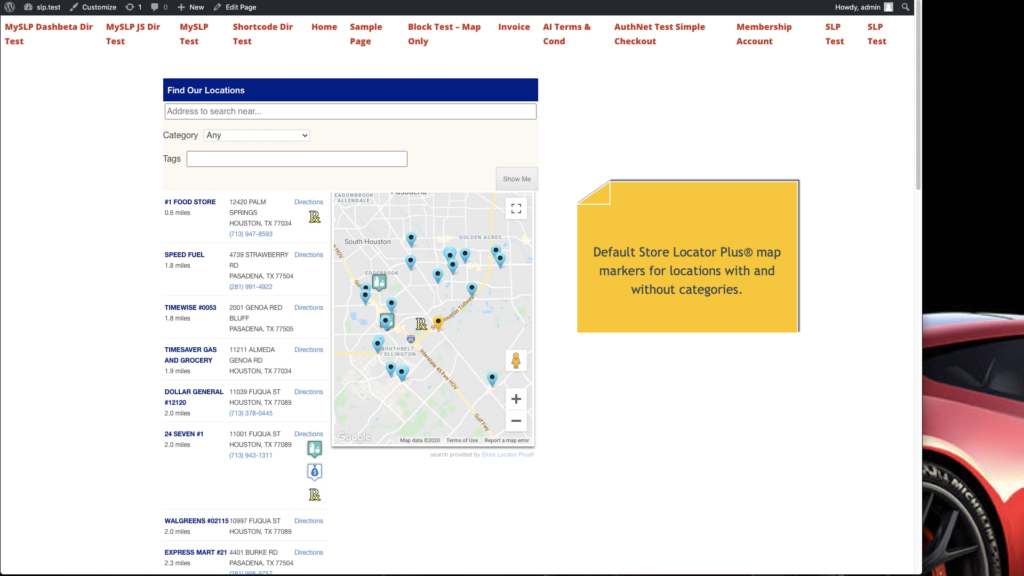
When a visitor goes to a page with the Store Locator Plus® map code embedded, it will show a default search form and a map centered in your country or on the “Center Map At” address you entered when configuring Store Locator Plus®. When someone searches for a zip code that is close enough to a location you entered it will show those locations on the map.
MySLP Professional and Enterprise level services allow for locations to be categorized. Each category for a location can have its own map marker associated with the category. These markers are then displayed on the map to mark the location. (This also applies for those customers using the WordPress SLP plug-in with the Power add-on or Premier)
However, some locations may belong to more than one category. In this case the map marker that is selected to be displayed on the map is determined by the RANK assigned to the category. If multiple categories have the same rank, or no rank, then the first category by alphabetical listing will be the one selected as the “main” category for rendering the map marker.
Default map markers when no category is selected.
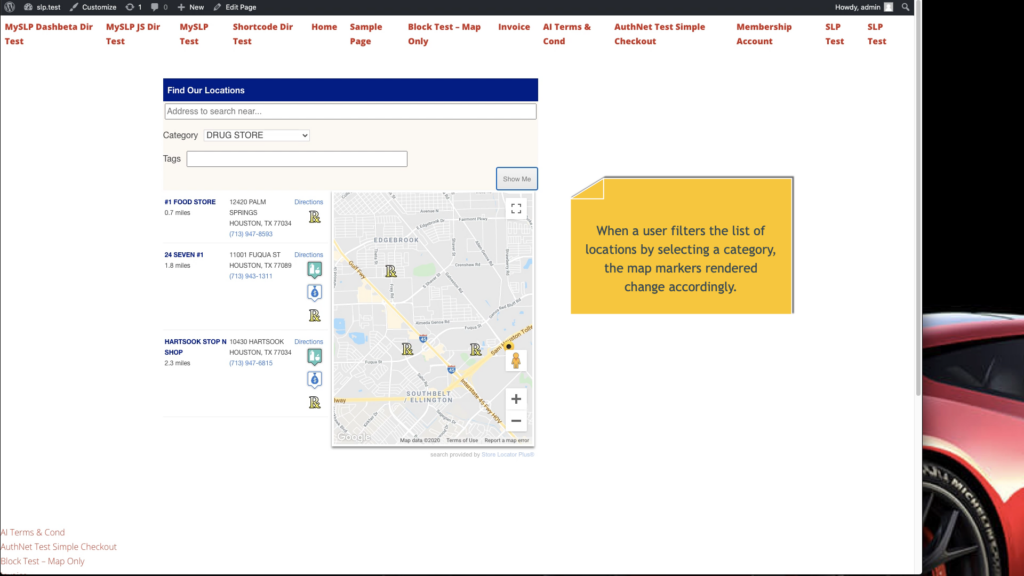
Filtering Locations By Category
What happens when a user decides to filter the list of categories? Only locations that are within the selected category are shown.
If the location only belongs to ONE category, as is the case for the “#1 Food Store” in our example above, the choice is easy. Show the category map marker.
But what should be displayed if a location belongs to several categories, as is the case for our “24 Seven #1” location shown in the example above?
Prior to our mid-September 2020 release of Store Locator Plus® (or the Power 5.5.7 add on for our legacy WordPress plugin users), the marker for the “24 Seven #1” location would be the highest ranked category, which is the convenience store marker.
With the mid-September 2020 release, however, this behavior has changed. The map marker displayed will be the one that matches the filter the user selected.
Since our mid-September 2020 release, category filters change the map markers to match.
Multiple Location Categories
What about Store Locator Plus® interfaces that allow users to select more than one category, such as interfaces that allow checkbox selections for categories? Markers will be chosen from the markers for the selected categories only. If a location matches 2 or more of the categories, the highest ranked OF THOSE SELECTED will be displayed on the map.
This is different from earlier versions of Store Locator Plus® where it would always display the highest ranked category map marker, even if it was not part of the checked list of categories.
The Locations panel in Store Locator Plus is where you add, manage, edit and/or delete locations.
Bulk Actions and Filters
SLP Locations panel has a bulk tab with drop down actions and other filters that can be applied . If you have a large number of locations, bulk actions can be a very useful tool. If you have more locations than can fit on the display, you can set the display filter to show more locations. You may also use filters to display and manage non – geocoded locations, or show locations with certain properties. The display can be adjusted to suit your needs but configuration constraints and/or server constraints may effect your outcome.
Not all Bulk actions will appear if you have only the base plugin installed. Bulk action filters for removing Tags, performing Exports, geocoding all uncoded, and bulk categorize certain locations will be shown only if you have the WPSLPPower add-on or Professional or Enterprise level Plans for MySLP
The default number of locations that will be displayed on the admin user Interface is 10. Selecting a large number to display can be useful to view or manage but if your server capacity cannot handle it or changes and you go back to manage locations months or years later and try to access your locations panel, you may see no locations panel. If you see the wheels churning on your computer with no results this could be the reason. If you are not sure of the capabilities of your server, browser and various other factors that effect memory, and inhibit loading and displaying fields, err on the side of caution and set the Filter Display locations back to a manageable size before leaving the panel. If you are migrating servers from a “heavy duty” server to a less robust server, or if your memory becomes an issue you will need to reset the display to a manageable number. See Troubleshooting for more info.
(This page has been updated to reflect the changes in Google Cloud Platform API changes)
Most likely reasons;
You moved your site or changed the domain name and did not change your Google Map API key or , as of JUNE 2018 Google API changes, did NOT ADD BILLING TO YOUR API KEY . See Getting Started
If you have the Power add-on and are using the import function , your csv file is incorrect, or your header rows are not accurate, or they have wrong field names, the columns may be misaligned and the data field for an address could not import and/or does not geocode. Check your import message log.
Google does not recognize an address. See FAQ post
The WPSLP Power Add On or MySLP/Professional plan allows you to import CSV files with several options. View the information under SLP/Locations/Import . You have various options to consider when determining how to update locations that match your pre-existing locations.
Options available on how to handle duplicates: Choose to Add, Skip, and /or Update.
Please check your versions on our Home site to ensure you are using the latest versions of the plug-in and add-ons. A lot has changed since release 4.9.2. See our News channel for latest information regarding WordPress, SLP, and Google changes. Changes to the terms for Google API use went into effect or or about June 11, 2018. This effected every plug-in that utilized Google APIs. Newer Versions of WPSLP added fields for Google API key placement. This means, if you had been using older versions in order to keep legacy add-ons, and never added your Google MAP API key to SLP, your map will not display correctly. See News for current information
Our MySLP locator service updates the versions for you and takes care of the Google Maps and geocode API s. You add your locations and adjust your map look-and-feel settings– then when you are ready paste a JavaScript snippet into your website. It doesn’t even need to be running WordPress.