Step 1: WordPress Users Need A Google API Key

SaaS users can skip this step. Store Locator Plus® for WordPress users need a Google API key to utilize the full features available in the the plugin. WordPress administrators who are self-managing their plugin updates, security, and Google services need to setup a Google API account so they can start billing for map services. 

If you are a subscriber to  Store Locator Plus® – our SaaS directory and locator service, you can ignore this page, we’ve got it covered. Go to our Getting Started guide and move on to Step 2.

For the Store Locator Plus® for WordPress users these instructions are a general guideline. You will need to visit Google and read their User guide to obtain a new account or update your existing account. Google will bill you directly for your monthly map views and location look-ups.

Store Locator Plus Location Imports troubleshooting

On  June 11, 2018  Google changed their API.  There is now a pay as you go billing requirement. You  will need to reconsider how to import, how often to import , and whether to break the list into smaller chunks , or skip geocoding.  (Or switch to the MYSLP SaaS managed service and choose the Professional or  Enterprise level plan ( restrictions apply) .

In order to perform bulk location imports with a CSV file for the WPSLP plugin you will need the Power add-on installed.  WPSLP Power add-on does not alleviate the need for you to obtain your own Google API key.  MySLP  SaaS users  do not need to obtain their own API keys but will need the Professional level plan or higher to import.

Q: Some of the Map Markers are not where I know they should be how do I fix this?

When a location is added into your SLP data set, you will see a message “Store Locator Plus wants you to know:”  and the output of the Latitude and Longitude where Google thinks the location is.

For Example, I added Sydney Opera House and no street address, just name, the city and the country Australia:

“Google thinks Sydney Australia is at lat: -33.8674869 long 151.2069902”

Importing Large Lists into WP Store Locator Plus

Hints for the WordPress Store Locator Plus stand alone, self managed plugin with Power add-on. Import features available with the Power Add-on

Load Data

If checked , use the faster MySQL Load Data method of file processing. Only base plugin data can be loaded, see the approved field name list.

This feature uses the MySQL Load Data command and is much faster than WordPress / PHP CSV file parsing, with the typical Google Geocoding limitations on performance and record counts (if you are not supplying, filling in the latitude/longitude data fields). This feature will only import basic location data. It does not import extended data fields or category data. If you use this along with  per-entered latitude and longitude values you can import 100,000 locations in less than 10 minutes on a basic web server. The column headers must be included in the file and must match the basic fields. You do NOT need to include all columns.

Location Imports

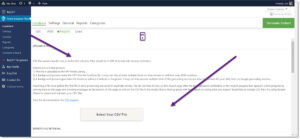
Location Imports are handled via a CSV file for users that signed up for the MySLP Professional  SaaS service or are using the WPSLP Power Add On with Store Locator Plus plug-in for Word Press current version. With MYSLP the import feature is under the StoreLocatorPlus sidebar/locations as shown in screenshot. If you are using WPSLP self managed and have the Power add-on it will look similar.

CSV Import Format

Getting the proper CSV format can be a challenge when using spreadsheet apps like Excel or Numbers.  Here are some tips to getting a valid CSV format out of a spreadsheet app:

  1. Make sure you always have a header row.  That tells the import process what data is in each column.   The column headers have meaning, so be precise.
  2. When a cell is a text field that STARTS WITH A LEADING ZERO, make sure you explicitly mark the cell as text.   The easiest way to do this is to type a single apostrophe then the number when adding data to the cell as in ‘01886 for the zip code 01886.
  3. Always export with UTF-8 support enabled.
  4. Export to a CSV format.  Comma delimited not tab delimited and quoted strings if given the option.

Check out the Example CSV Imports post to get some usable import files you can play with.