Locations Panel: Manage Locations

The Locations panel in Store Locator Plus is where you add, manage, edit and/or delete locations.

Bulk Actions and Filters

SLP Locations panel has a bulk  tab with drop down actions and  other filters that can be applied .   If you have a large number of locations, bulk actions can be a very useful tool. If you have more locations than can fit on the display, you can set the display filter to show more locations. You may also use filters to display and manage non – geocoded locations, or show locations with certain properties. The display can be adjusted to suit your needs but configuration constraints and/or server constraints may effect your outcome.

Not all Bulk actions will appear if you have only the base plugin installed.  Bulk action filters for removing Tags, performing Exports, geocoding all uncoded, and bulk categorize certain locations will  be shown only if you have  the WPSLP Power add-on or  Professional or Enterprise  level Plans for MySLP

The default number of locations that will be displayed on the admin user Interface is 10. Selecting a large number to display can be useful to view or manage but if your server capacity cannot handle it or changes and you go back to manage locations months or years later and try to access your locations panel, you may see no locations panel. If you see the wheels churning on your computer with no results this could be the reason. If you are not sure of the capabilities of your server, browser and various other factors that effect memory, and inhibit loading and displaying fields, err on the side of caution and set the Filter Display locations back to a manageable size before leaving the panel. If you are migrating servers from a “heavy duty” server to a less robust server, or if your memory becomes an issue you will need to reset the display to a manageable number.  See Troubleshooting for more info.

CSV Import Duplicates Handling

The WPSLP Power Add On  or MySLP/Professional plan   allows you to import CSV files with several options.    View the information under SLP/Locations/Import .  You have various  options to consider when determining how to update  locations  that match your pre-existing locations.

Options available on how to handle duplicates:  Choose to Add, Skip, and /or Update.

Store Locator Plus Location Imports troubleshooting

On  June 11, 2018  Google changed their API.  There is now a pay as you go billing requirement. You  will need to reconsider how to import, how often to import , and whether to break the list into smaller chunks , or skip geocoding.  (Or switch to the MYSLP SaaS managed service and choose the Professional or  Enterprise level plan ( restrictions apply) .

In order to perform bulk location imports with a CSV file for the WPSLP plugin you will need the Power add-on installed.  WPSLP Power add-on does not alleviate the need for you to obtain your own Google API key.  MySLP  SaaS users  do not need to obtain their own API keys but will need the Professional level plan or higher to import.

CSV File Import Header

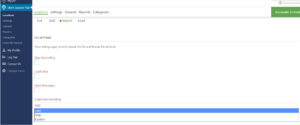
All Store Locator Plus CSV files must start with a file import header that indicates what data is in each column.

The  first row of the Store Locator Plus import file should look like this, you do not need the (sl in front of the header name for the basic import function to work):

sl_store,sl_address,sl_address2,sl_city,sl_state,sl_zip,sl_country,sl_latitude,sl_longitude,category,sl_tags,sl_description,sl_email,sl_url,sl_hours,sl_phone,sl_fax,sl_image,sl_private,sl_neat_title

Please see the Example CSV files post for a sample base file with a header.

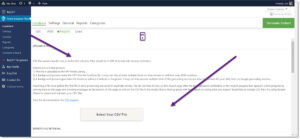
To speed up imports you should NOT include columns that have no data.

For imports that did NOT start out as a CSV export from the SAME SITE you should NOT have an sl_id column.

For geocoding, assigning a latitude and longitude, to work during import you need to have at least one of the address fields in your file and preferably these main fields:

  • sl_address
  • sl_city
  • sl_state
  • sl_zip

All field names can drop the leading “sl_” for readability.   For example sl_address can become address. The field names usually match the field label, for example if you have  the Experience add on  or the Professional level or higher SaaS plan , you can have “Featured” and “Rank” as import columns.

Power (WPSLP)add-on or Professional Level (MySLP/SaaS) Overview

The Power add on for WordPress Store Locator Plus and the Power level for MySLP product line is within the Professional plan share similar features and functionality.  Whereas they are similar, they are not interchangeable.   There is a feature for MySLP subscribers that will allow some basic location loading from your SLP or other WP locator base plug-in. See News feed here for more info. MySLP SaaS version does not have SEO Pages or Directory Builder capability.

Note: Where the WP symbol appears below, those features are built into the WordPress SLP Power add-on only.

Categorization

Assign categories to your locations that allow users to pick a category and show only those locations.  Great for showing service versus retail centers or locations that carry specific products.

Importing Locations With Territories

Importing locations with territories follows the same procedure as importing a standard locations file.  As with all location files the format must be a proper CSV file exported using the UTF-8 character set with no special or non-printable characters.

To load the territory data you must have first enabled the territories feature in the Premier Add On.  You will also need to have installed and activated with the Pro Add On or Power Add On for Store Locator Plus.

Your CSV file should add the following five columns to the file.    Make sure you add the field names to the top of each of these new columns as listed here:

  • territory_distance_unit
  • territory_distance_north
  • territory_distance_south
  • territory_distance_east
  • territory_distance_west

Within each column you will want to have the following values:

  • territory_distance_unit can be ‘miles’, ‘km’, or be blank.  If this is not set to ‘miles’ or ‘km’ it will assume the territory is not enabled for this location.
  • territory_distance_north , south, east, and west should be the distance north, south, east, or west from the location that is part of its territory.

The territory boundaries will automatically be calculated for each location during the import.

Location Imports

Location Imports are handled via a CSV file for users that signed up for the MySLP Professional  SaaS service or are using the WPSLP Power Add On with Store Locator Plus plug-in for Word Press current version. With MYSLP the import feature is under the StoreLocatorPlus sidebar/locations as shown in screenshot. If you are using WPSLP self managed and have the Power add-on it will look similar.

CSV Import Format

Getting the proper CSV format can be a challenge when using spreadsheet apps like Excel or Numbers.  Here are some tips to getting a valid CSV format out of a spreadsheet app:

  1. Make sure you always have a header row.  That tells the import process what data is in each column.   The column headers have meaning, so be precise.
  2. When a cell is a text field that STARTS WITH A LEADING ZERO, make sure you explicitly mark the cell as text.   The easiest way to do this is to type a single apostrophe then the number when adding data to the cell as in ‘01886 for the zip code 01886.
  3. Always export with UTF-8 support enabled.
  4. Export to a CSV format.  Comma delimited not tab delimited and quoted strings if given the option.

Check out the Example CSV Imports post to get some usable import files you can play with.

Associating WooCommerce Products With Locations

Associating Store Locator Plus locations with WooCommerce products is a new feature provided by the Premier plugin for Store Locator Plus.    The Premier plugin is an add-on that is available exclusively to Premier Subscription holders.

In order to activate the WooCommerce product mapping features of the Premier add-on, you will need to WooCommerce installed and activated on your site.    When WooCommerce is installed the WooCommerce modules are automatically activated within the Premier add-on.  You should activate WooCommerce before importing locations with WooCommerce product relations.