Extended contact information fields are available with the Power add on for WordPress or the Power / Professional / Enterprise levels of MySLP.
Enable Contact under the General/App tab.
for Store Locator Plus®
Details for the Advanced level SaaS service. Many features are present in the Store Locator Plus® for WordPress plugin.

If you have the Power Add-on in addition to the Experience Add-on you have additional fields that can be displayed with the use of shortcodes and attributes.
The Power Add-on has Contact Fields that can be associated with your locations for adding internal special ids for updates or to add filters. The contact fields will not automatically appear in your results on the front end.
Hints for the WordPress Store Locator Plus stand alone, self managed plugin with Power add-on. Import features available with the Power Add-on
If checked , use the faster MySQL Load Data method of file processing. Only base plugin data can be loaded, see the approved field name list.
This feature uses the MySQL Load Data command and is much faster than WordPress / PHP CSV file parsing, with the typical Google Geocoding limitations on performance and record counts (if you are not supplying, filling in the latitude/longitude data fields). This feature will only import basic location data. It does not import extended data fields or category data. If you use this along with per-entered latitude and longitude values you can import 100,000 locations in less than 10 minutes on a basic web server. The column headers must be included in the file and must match the basic fields. You do NOT need to include all columns.
Q: I have 20 locations filled in on the back end, but only 5 show up on the front end. What am I missing?
A: Establishing various parameters in the settings under the Settings/Search and under the Settings/ Results tab in your SLP User interface will effect how your results are displayed. Setting the Results radius to a large enough number to include all locations is paramount to achieve best results.
Getting Started , Results Settings and Search settings are also explained in the Documentation. You can search by keyword or click on the menu sidebar.
A: The latest version of Store Locator Plus may have disabled your Legacy add-ons to ensure your site does not crash due to coding changes, bug fixes and updates to WP including security fixes. This is not a free auto update , you need to log into your account: Go to “MY Account” on Store Locator Plus.com and purchase the replacement for the Legacy add-ons . If you decide to roll back SLP to an earlier version. (not suggested, always be sure to have a back-up of your site. You may find back-up info in Vault Press or Jet Pack. If you do decide to downgrade SLP to an earlier version we cannot provide support and cannot make any guarantees on whether or not it will work correctly.
For compatibility and replacement info see Legacy replacements
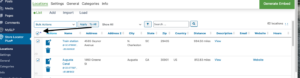
If you have any of the Store Locator Plus featured Add-ons such as Power, Experience, or Premier add-ons , or if you have the MySLP Saas Professional or Enterprise level plan you will see additional sections when Adding (or managing) a Location.
You can opt to fill in all the rows and info that determine the Location and geocoding and hit Add button if you are done entering information. Or you can opt to continue to the next section, whether it be featured, tags, categories, or other functions that are in separate sections on the Location Add Tab.Click the “Add button” at the bottom of the next section instead.
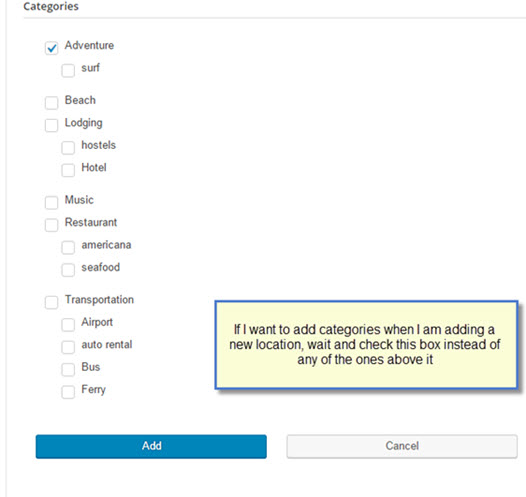
For example, I want to add a location that also is going to have a category assigned to it. I have the latest version of the Power Add-on activated. After adding all the Location information, I do not click on the Add button under the location information but continue on down to the next section called “Power” and add whatever pertinent information I wish to add there. Once I am satisfied and have no additional data to add, I click on the Add Button under the Power section of the Locations Panel to create the location that I have just added.
The category or other additional data you just associated will appear when you review the Locations Page.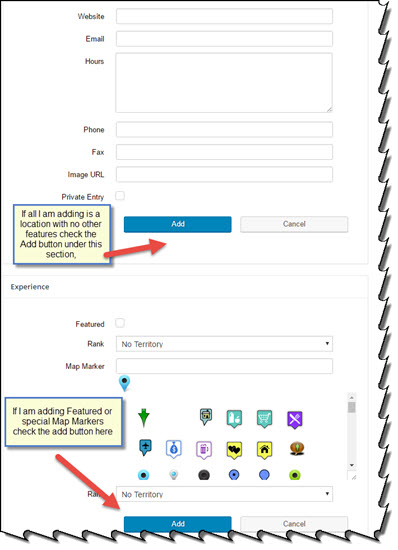
You must have the MYSLP/Professional level or the WPSLP plug-in with the Power add-on .
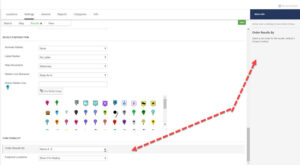
The Store Locator Plus default is to show the order of the results below your map by distance, i.e. closest to the searched address listed first. With the Experience Add-on or the Premier Add-on the “order by” options allows you to display the results in a different order. With the Experience add-on (if you are using WordPress SLP) or the Professional Plan (if you are using the MySLP Subscription) the results order by options are under your Settings/Results/Panel
The ability to categorize your locations using the WordPress category (taxonomy) system. The Categories Manager (Formerly known as Tagalong) is part of the Power Add-on for WPSLP self managed customers, and available for the MYSLP Professional or higher plans) It builds on the Store Locator Plus store_page taxonomy that is also used with the Pages portion of the Power Add-on (for WPSLP stand alone). Build a “simple flat list” of categories or a hierarchical (parent/child) category structure. Once you’ve categorized locations you will find other added benefits on the user interface.
