The Store Locator Plus® SaaS platform works for any web platform or application the supports embedded JavaScript. All of the popular website tools including WordPress, Wix, Weebly, SquareSpace, Joomla, Ghost, and Django support embedded JavaScript. We’ve even seen sites running NetSuite and SalesForce embed Store Locator Plus® maps.
The default format for the results string uses the numerical encoding for the various data elements that can be rendered. This default string format is present in the base Store Locator Plus plugin. You can reset to the default at any time by deleting the entry in the Results Layout field under Settings/Results/Appearance and saving the settings.
Locations are added to Store Locator Plus® via the sidebar menu via the locations submenu. This option presents a list of all locations along with a menu option to add a location via a web form.
If you have many locations and have either the Power add-on enabled for the plug-in or have signed up for the Professional level plan for the mySLP SaaS you can import them via a CSV import file.
When a visitor goes to a page with the Store Locator Plus® map code embedded, it will show a default search form and a map centered in your country or on the “Center Map At” address you entered when configuring Store Locator Plus®. When someone searches for a zip code that is close enough to a location you entered it will show those locations on the map.
All Store Locator Plus® software updates are handled for you.
There are no Google or other map location service API keys to manage.
Store Locator Plus® bills a low easy-to-understand monthly fee.
WordPress
You must manage your own Store Locator Plus® software updates.
Google requires an API key for all products using their map software. You must create, manage, and secure your own API key.
Google will bill you for every map view and location geocoding request. Rates are on a sliding scale and are different for map views and location look-ups.
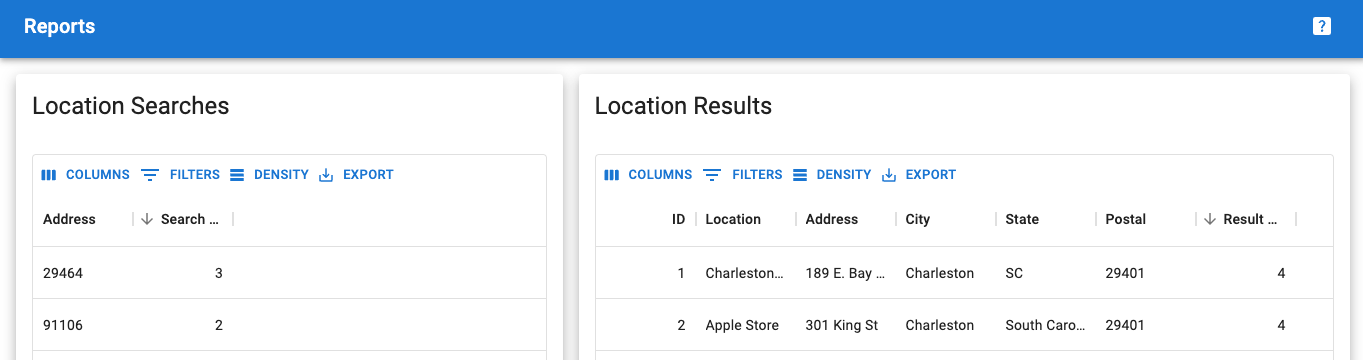
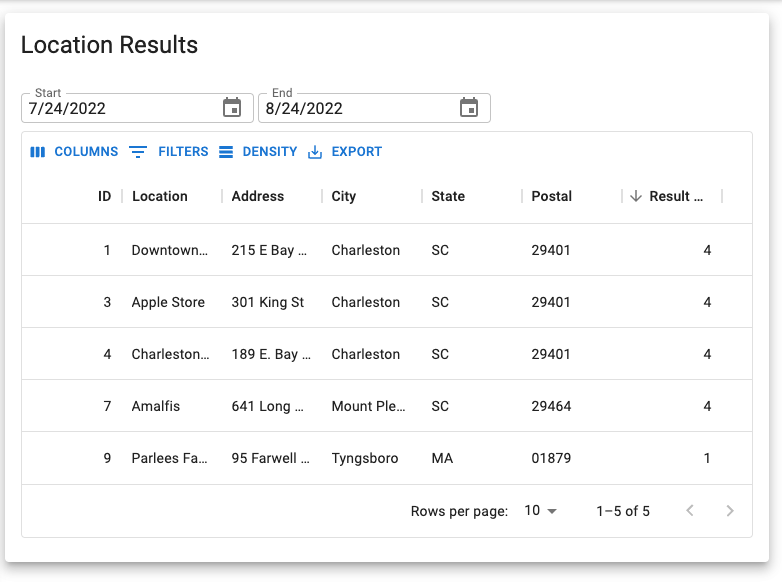
Location Results reports are included with the Professional or Enterprise plan. This report is designed to show the locations that were returned by users entering addresses on the search form when looking for locations. This can be useful for determining which locations are appearing most frequently for your site visitors.
To view this report you’ll need to turn on reporting features as outlined in the Reports documentation.
Location Results Report 2208.15+
This report will show up to the top 500 locations returned within the date range selected.
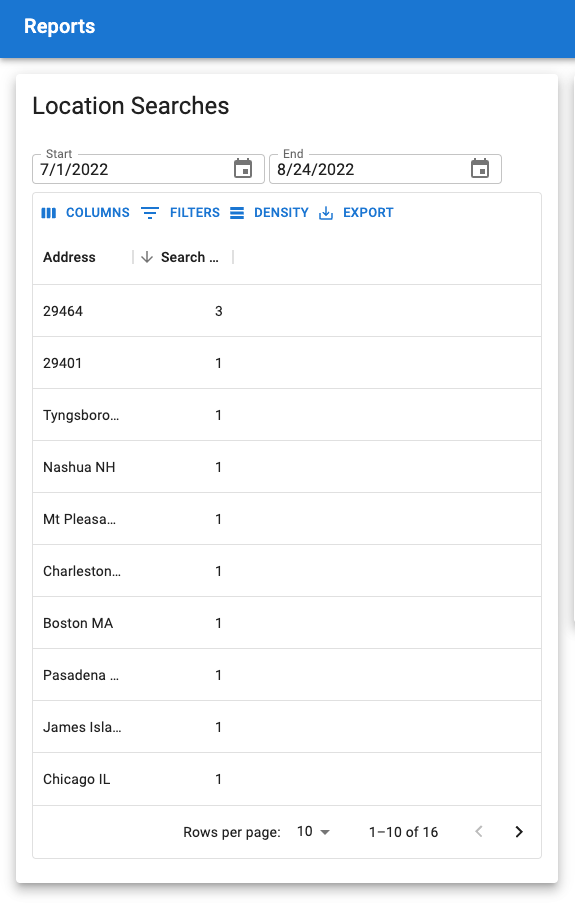
Location Search reports are included with the Professional or Enterprise plan. This report is designed to show what addresses users are entering on the search form when looking for locations. This can be useful for determining areas where your site visitors are looking for your product or service.
To view this report you’ll need to turn on reporting features as outlined in the Reports documentation.
Location Search Report v2208.15+
This report will show up to the top 500 searches within the date range selected.
WordPress environment is setup and configured including activation of the following plugins
Store Locator Plus®
SLP Power add on
In addition map service (Google API keys) should be in place and some locations should be added to the system.
A page has been created with the [slplus] shortcode present and the map is rendering properly.
Users are logged in as a WordPress administrator (the process will be slightly different for SaaS users).
Adding Categories To Locations
Objective
Create a location category and attach it to an existing location.
User Action: Add A Location Category
Click on Store Locator Plus® | Categories in the WordPress sidebar menu.
In the left “Add New Category Form”…
Type a category name. (Restaurant)
Click Add New Category
Result
The new category should appear on the category list on the page.
Category list after adding the restaurant category.
User Action: Attach Category To Location
Click on Store Locator Plus® | Locations in the WordPress sidebar menu.
Click the Edit action icon on the first location.
Check off the box next to “Restaurants” in the Power | Categories section of the form.
Click Save.
Result
The category is assigned to the location and appears on the location table.
The location with an assigned restaurant category. This view is showing fewer columns as the Screen Options was updated to removed unused columns from the table view.
User Action: Show Category Select On Front End
Click on Store Locator Plus® | Settings in the WordPress sidebar menu.
Change the Category Selector setting to “Single Drop Down”.
Click Save
On the front end, go to the page that has the [slplus] shortcode.
Result
The search form for the map should show a category drop down.
The front end page with the [slplus] shortcode, showing the category selection filter.
User Action : Filtering Locations With Category
On the front end, go to the page that has the [slplus] shortcode.
There are five to seven sections under the Settings/Results tab admin panel depending on which add-ons you have activated. Each section describes when and/or where the results will appear under your map.
Not all of the settings will appear if you have the Advance level plan for SaaS or do not have the Experience and/or the Power add-ons for the basic WPSLP self managed plug-in.
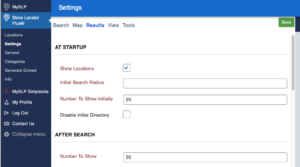
At Startup
You determine the Number of results you want to appear on the map and locator page as soon as the page loads when you have “Show locations at startup” checked. We recommend 50 for most sites unless you have the Premier add-on or Enterprise level plan (if using MYSLP) which allows less clutter on the map by virtue of “cluster markers”.
The next setting is the radius to search initially when “Show locations at startup” is checked. Leave empty to use the map radius default. Recommended : Set to a large number to search everywhere.
And the third setting is : ” Number to show initially.” How many results do you want to show under the map? This is the part that populates the actual information regarding your locations (under or next to your map depending on the style) with the address, website info, phone, etc.
If you are signed up for the MYSLP, the Professional level plan) additional settings can be enabled , for example do NOT show the results until after a search has been performed”. The setting is labeled “Disable Initial directory”
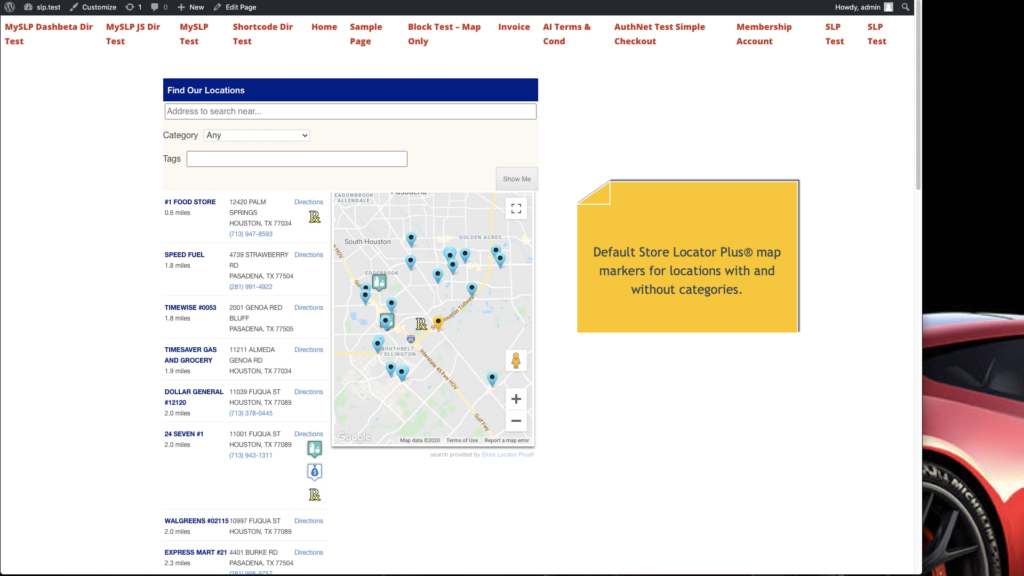
MySLP Professional and Enterprise level services allow for locations to be categorized. Each category for a location can have its own map marker associated with the category. These markers are then displayed on the map to mark the location. (This also applies for those customers using the WordPress SLP plug-in with the Power add-on or Premier)
However, some locations may belong to more than one category. In this case the map marker that is selected to be displayed on the map is determined by the RANK assigned to the category. If multiple categories have the same rank, or no rank, then the first category by alphabetical listing will be the one selected as the “main” category for rendering the map marker.
Default map markers when no category is selected.
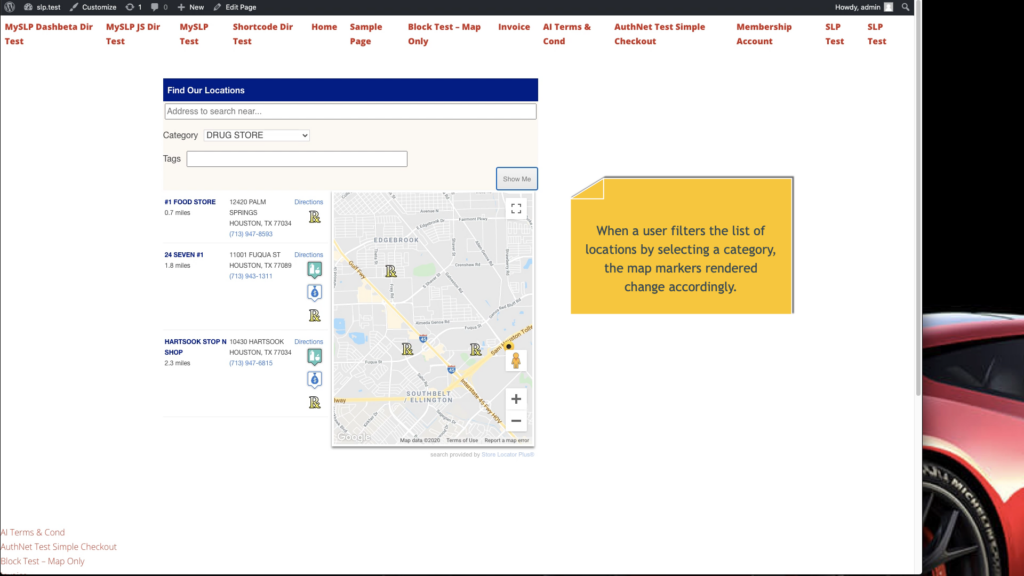
Filtering Locations By Category
What happens when a user decides to filter the list of categories? Only locations that are within the selected category are shown.
If the location only belongs to ONE category, as is the case for the “#1 Food Store” in our example above, the choice is easy. Show the category map marker.
But what should be displayed if a location belongs to several categories, as is the case for our “24 Seven #1” location shown in the example above?
Prior to our mid-September 2020 release of Store Locator Plus® (or the Power 5.5.7 add on for our legacy WordPress plugin users), the marker for the “24 Seven #1” location would be the highest ranked category, which is the convenience store marker.
With the mid-September 2020 release, however, this behavior has changed. The map marker displayed will be the one that matches the filter the user selected.
Since our mid-September 2020 release, category filters change the map markers to match.
Multiple Location Categories
What about Store Locator Plus® interfaces that allow users to select more than one category, such as interfaces that allow checkbox selections for categories? Markers will be chosen from the markers for the selected categories only. If a location matches 2 or more of the categories, the highest ranked OF THOSE SELECTED will be displayed on the map.
This is different from earlier versions of Store Locator Plus® where it would always display the highest ranked category map marker, even if it was not part of the checked list of categories.