Store and Category Manager

Store and Category Manager interface is available if you have the  Power  Add-on installed (for WPSLP users) or have the MYSLP Professional level or higher. You will see a tab “Categories” in your Store Locator Plus User Interface.

Under side menu MYSLP/StoreLocatorPlus menu

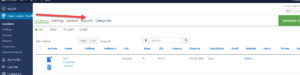
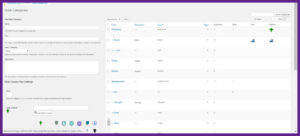
Once you open the Category Tab  you can begin to add categories and slugs or edit existing.  Set Markers and Icons per category (optional) if you want those to appear in place of map markers.  A Bulk action drop down to delete some or all categories is  at the top of the category box.

Settings/Search

You can choose to show the categories that you have created in a drop down menu as part of the search form.  There are additional category selector options available for WPSLP premier subscribers  or MYSLP Enterprise subscribers (example see Checkbox selector). You can add text as a label that will display  at the top of the categories drop down menu, or you can leave blank.  You can also add text for the category select box that will appear in front of the category drop down on the user interface.

Hide Empty Categories Setting

For WPSLP Power add-on users . Do NOT turn this on unless you have   Pages enabled.

Settings/Results

If you want the category icons to appear in results list check off Category Icons

Categories

The ability to categorize your locations using the WordPress category (taxonomy) system.  The Categories Manager (Formerly known as Tagalong) is part of the Power Add-on   for  WPSLP self managed customers, and available for the MYSLP Professional or higher plans)  It builds on the Store Locator Plus store_page taxonomy that is also used with the Pages portion of the Power Add-on (for WPSLP stand alone).  Build a “simple flat list” of categories or a hierarchical (parent/child) category structure. Once you’ve categorized locations you will find other added benefits on the user interface.

How to upload and install your Word press Store Locator Plus and Add-Ons

Obtaining SLP  Add On Pack

Note  This page does not apply to our SLP SaaS subscription customers.   All updates for those customers are taken care of by us.  SLP SaaS is also referred to as MySLP. It is not a plug-in.  It is a managed Software service.  No need to worry what version you are on.

All add-on packs are available from the WordPressStore Locator Plus website.   Power Add-On ,  Experience Add-on , or you can purchase a Premier Subscription that provides access to all of the add-on packs as well as preferred access to the Premier support forums, pre-release products, new features and functionality that is  available only to subscribers.

Note: If you purchase the  Power or Experience add-ons as an upgrade to your existing  (Legacy) add-ons, the legacy add-ons will automatically be deactivated. Delete the legacy add-ons.  First “always have a full backup of your site”  We strongly recommend looking into the WordPress backup, or   Jet Pack.   One of the features included , besides real-time incremental backups of your site with restore points, is the ability to restore the site to an alternate site

<!–more–>

Install An Add On Pack

SLP version 5.10 and above are not listed in the WordPress Plugin Directory.    Ditto any add-ons you purchased from our Store front . As such the first time you add the plug-in it will  need to be installed via the below  installation process.

  • Login To Your Store Locator Plus  Account
  • Download the latest zip file version
  • Login to your WordPress admin panel for your website.
  • Go to the plugins sidebar menu.
  • Select Add New.
  • Select Upload.
  • Browse to your downloaded zip file.
  • Click Install now.
  • Activate

Updating An Add On Pack

Once installed a query from the WordPress Admin Panel communicates with the Store Locator Plus servers and a message  or red line will be shown as updates are available.  Occasionally, the WP server times out before it gets to the SLP plugin servers. Use the check again tool in the WP Admin sidebar or check the versions at the Store Locator Plus home page.
WP check again

Some third-party plugins and WordPress themes can prevent the update notice appearing from the Store Locator Plus server.   It is prudent to visit the Versions Page and only if necessary, perform a manual update.  

You should perform updates on your test site or a staging site first to avoid downtime or potential  issues effecting your production (live) site. You should always have a recent back-up to restore to. The safest way to do manual updates, follow these steps

Deactivate the plugin you are updating
Delete the plugin
Go to Plugins | Add New
Select Upload
Upload the latest release zip file
DO NOT click the Activate button
Go to Plugins on the sidebar
Check off the plugin you just installed
Go to bulk actions and select activate

Adding Radius Selection First Entry

If you have the  WPSLP Experience Add On or the MYSLP/Professional plan   an additional setting is available under labels and will show you a new field named Radius first entry under the Settings/Search user interface.   When a Radius First Entry has been set it will appear as the first field  in the radius drop down that the user sees on your search form.   The value will be set to the default miles that you have set in Radii Options. The other radiis you have entered to allow users to search will appear in numerical order in the dropdown but the label for the first entry will appear first regardless of numerical order.

Hide Google Pegman (Street View)

Hide Street View is available as part of the Premier plugin included with the Premier Subscription for Store Locator Plus.  The Street View icon , also known as “pegman” appears on all Google Maps by default.  The Premier plugin allows you to turn this off.

Premier 4.5 Pegman Active
Premier 4.5 Cluster Map Markers
Premier 4.5 Pegman Inactive


Turning Street View On or Off

Go to the Store Locator Plus Experience Map tab and look for Hide Street View in the Appearance group.

Premier 4.5 Experience Map Settings

Cluster Map Markers

Cluster Map Markers is available as part of the Premier plugin included with the Premier Subscription for Store Locator Plus or the Enterprise level of MySLP.  Cluster Markers show a single map marker graphic (circle with number inside it) when two or more (you set this number) markers are within close proximity to one another on the current map view.   As a user zooms in on the cluster, the clusters break apart to show the individual markers.  When  zoomed out the individual location markers combine into a single marker graphic with the count of locations represented by the graphic shown in the center. You determine the default radius and minimum number of locations  before cluster map marker is engaged.  Your “center map at” and default radius setting will effect where the map center is located.

Turn On Cluster Markers

Go to the Store Locator Plus : Settings / Map and look under the Appearance section for “Enable Cluster Markers”.

Read the Store Locator Plus news articles about Cluster Map Markers.

Creating A List Of Location Pages [slp_pages]

This feature is available with an active Premier Subscription only.

Create a list of location pages, the Store Pages created by the Pages option of the Power add on, requires version 4.5 or later of the Power add on with the Pages option enabled.

Listing location pages is done by adding the [slp_pages] shortcode to your WordPress page or post.   Only published Store Pages are shown.   By default new pages created via the Manage Locations interface are created in ‘draft’ mode.

The Store Page [storepage] Shortcode

The [storepage] shortcode is used by the Pages and Power add ons to render live location data on a location (store) page.     The template is set under the Pages / Settings tab in the Initial Page Features group via the Page Template setting.

The [storepage] Shortcode

By default the [storepage] shortcode does not output any content.   You need to use one of the following attributes to generate location-specific output.

Attributes

  • class – augments the tag attribute with the specified CSS class
  • field – specify which location field to display
  • hard_coded_value – output the text in the wrapper
  • map – show a map with the location marker
  • post – output the WordPress post attributes for the page
  • tag – wrap the output with the specified HTML tag
  • title – output a title for list of pages
  • type – specify the type (style) for the output

Example CSV Import Files

CSV Imports are the most-used feature for our MySLP Professional users and for our WordPress  SLP self managed DIY customers that purchased the Power add on.

Learn about CSV Import formatting and other import notes.

Below files are examples only, you will need to set up your own import files to add your locations.

Example CSV Import Files

9 Restaurants Basic CSV Import

We consider this the simplest usable format for most businesses.  It includes the Store Name (Store), Address, City, State, and Zip columns.

You can download our example on our server here

9 Restaurants Full Address

A full address format of the 10 Restaurants Basic CSV Import format.  It includes the Store Name (Store), Address, Address 2, City, State, and Zip, and Country columns.

https://drive.google.com/open?id=1jE_BZTGpHrAuZzYy-K7CwLcFanPzKGC9

9 Restaurants With Latitude and Longitude

The same 9 places with full address and latitude and longitude.   Including latitude and longitude gets the locations online and active on the site faster.  This was created from an Export CSV of the above Full Address file when we stripped the sl_id column and all the blank columns at the end, relabeled the header row to be user friendly.

https://drive.google.com/open?id=1jkfRlY4K2retNGFaRVcW17WSLi_tfRmj

Remote file Retrieval; (Currently being patched )

One quick way to tell if your file is accessible is to put the URL you are using for your imports into your browser. Does it download a CSV file you can open with a text editor? If No; It isn’t a “vanilla” CSV file readable by the “Internet”.

This is the link you can use to see if remote file retrieval is working

For example — if you go HERE
https://demo.storelocatorplus.com/wp-content/uploads/2020/04/9-Restaurants-With-Lat-Lng-Cat.csv

you see an option to download a file

But if you go here :
https://demo.storelocatorplus.com/9-restaurants-with-lat-lng-cat/

it shows you a web page. That second link above from our demo site is NOT a valid remote CSV file URL

Google changed how share links on drives are working and we have found no way to get to the raw CSV file with any links they provided to us.

So Google Drive hosted CSV files is likely never going to work again.   Just one more way for them to track everything you do online by using an embed object vs. a flat CSV that they give you access too.

Limiting Search Results By Territory

The Premier Add On provides territories for locations.  Each location can have a territory assigned that describes a rectangular area with a boundary specified in miles or kilometers north, south, east, and west of the location.

You can restrict the list of locations a user sees via the Radius Behavior setting in Store Locator Plus.   The options and their influence on results returned is described in Radius Behavior.