Included in WPSLP Power.
Create data-driven WordPress pages for each location in your Store Locator Plus locations table. The layout that builds the initial pages can be modified and pages created, or re-created, en- masse. Once the initial Store Pages have been created they can be modified on a per-location basis.
To get started you must first Enable Pages.
Creating Location Pages
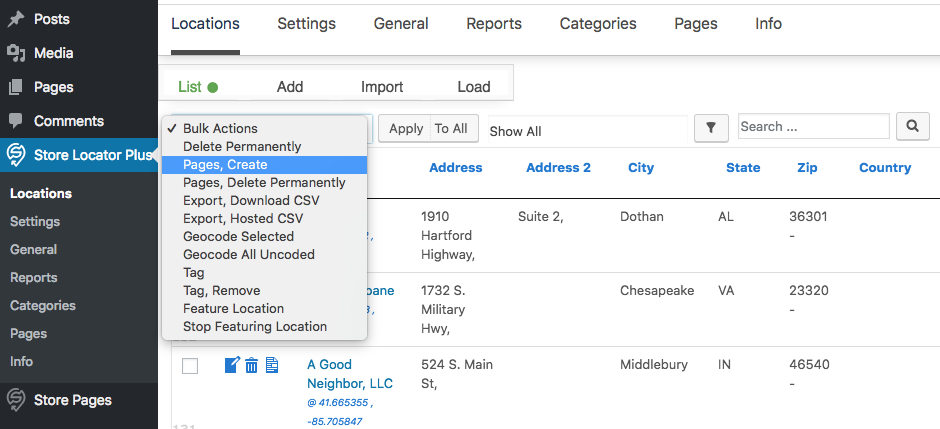
After enabling pages you could just go to the Store Locator Plus | Locations | List | Bulk Actions and Create Pages. A stack of pages, in draft mode, will be generate ready to be published on your site.
Often you’ll want to tailor the output first by setting the Page Template. You’ll probably want to have the pages automatically public so you can change the default status as well.
Page Template
Before creating the per-location pages you will want to check the default Pages settings.
Find it under Store Locator Plus | Pages | Initial Page Features | Page Template

The default page template will likely suffice for getting you started. If you want to add special headers, text , or other content on every location details page you create you can change it here. When you create, or recreate, your pages via the Store Locator Plus Locations tab the template specified here will be used to set the initial page content.
[storepage] Shortcode
Special storepage shortcodes are available to your page content and will display the current location data as well as provide shortcuts for building email links and placing a location-specific map on the page.
[slp_location] Shortcode
You can also use the [slp_location] shortcode if you wish to have the store information rendered with additional processing that matches the output typically used under the map, known as the “results output”.
For example using [slp_location phone] in the page template and then creating the store page via the Store Locator Plus | Locations | List | Bulk Actions drop down will place a auto-dial hyperlink on the page instead of a plain-text phone number.
Setting Read More Breaks
WordPress supports the <!–more–> server-side tag (quick tags in WordPress parlance) to set the point in which a post will “break” and show “Read More” when displaying a list of posts or pages.
You can add this tag to the Page Template to let your WordPress theme know where to break the Store Page when it is displayed in a list of pages. This same mechanism is used with the [slp_pages] shortcode within Store Locator Plus.
If you add this to your page template you will need to re-create your pages by going to the Store Locator Plus | Locations | List | Bulk Actions drop down and selecting “Create Pages”.
The other option is to go to the Store Pages list and editing the location pages by hand. Keep in mind the <!–more–> tag needs to be added in TEXT edit mode not visual mode.
Activating Read More For [slp_pages]
WPSLP Power includes a Read More Text setting. If this setting is empty the <!–more–> page breaks are ignored when using the [slp_pages] shortcode to generate a list of Store Pages. Enter text here to set the “Read More” verbiage and activate the more functionality on your page lists.
Set Page Status To Published
Find it at Store Locator Plus | Pages | Behavior | Default Page Status
Set the Default Page Status to Published.
Visitors to your site can only see pages with a status of Published. Most WordPress themes will only search and build page listings and directories of pages with a status of “Published”. The exact capabilities depend on your selected WordPress theme and their support of custom post types.
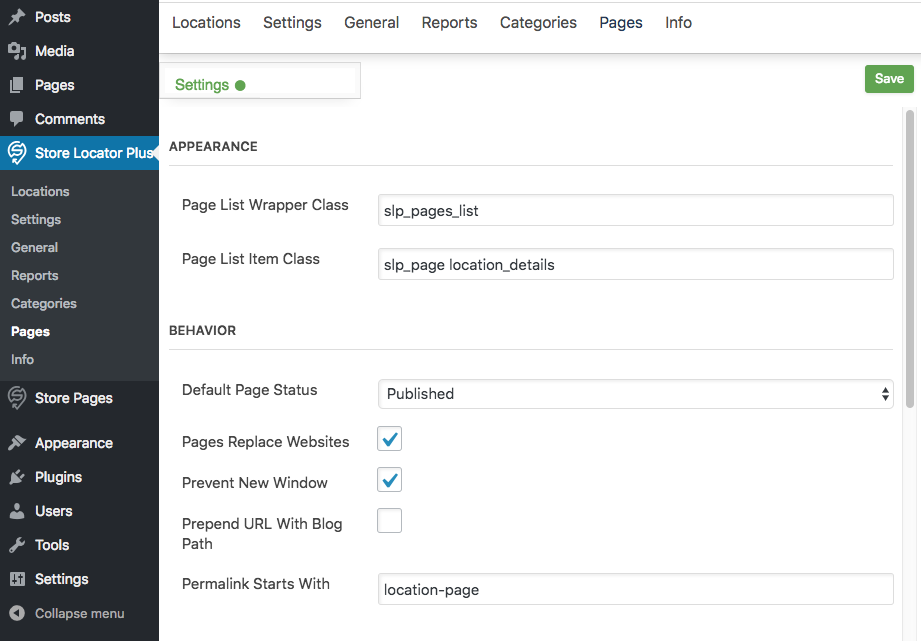
The default setting is “Draft” which allows you , as a WordPress site administrator, to preview how the Pages look before being see by the general public. If you leave the setting here as “Draft” you will need to manually change each Store Page to “published” via the Store Pages entry on the WordPress admin side menu.
Generate Your Pages
Find it at Store Locator Plus | Locations | List .
Check the “select all locations” checkbox at the top of the list of locations table. Under the bulk actions drop down menu and select “Create Pages”. A new Store Page will be created of each location that is checked.
Check Your Results
Find it at Store Pages
Click on Store Pages on the WordPress admin side menu. This is where you will find a list of the custom WordPress “Store Page” custom page types.
From here you can change pages from published to draft state or customize how pages look on a per-location basis. Keep in mind that any customization you do here will be overwritten if you create/recreate Store Pages via the Store Locator Plus Locations tab.