Q: Can you help me identify the Store locator Plus add-ons that replace the add-ons now described as Legacy?
A: Power Add-on will deactivate and replace the following:
for Store Locator Plus®
Q: Can you help me identify the Store locator Plus add-ons that replace the add-ons now described as Legacy?
A: Power Add-on will deactivate and replace the following:
Q: I have 20 locations filled in on the back end, but only 5 show up on the front end. What am I missing?
A: Establishing various parameters in the settings under the Settings/Search and under the Settings/ Results tab in your SLP User interface will effect how your results are displayed. Setting the Results radius to a large enough number to include all locations is paramount to achieve best results.
Getting Started , Results Settings and Search settings are also explained in the Documentation. You can search by keyword or click on the menu sidebar.
A: The latest version of Store Locator Plus may have disabled your Legacy add-ons to ensure your site does not crash due to coding changes, bug fixes and updates to WP including security fixes. This is not a free auto update , you need to log into your account: Go to “MY Account” on Store Locator Plus.com and purchase the replacement for the Legacy add-ons . If you decide to roll back SLP to an earlier version. (not suggested, always be sure to have a back-up of your site. You may find back-up info in Vault Press or Jet Pack. If you do decide to downgrade SLP to an earlier version we cannot provide support and cannot make any guarantees on whether or not it will work correctly.
For compatibility and replacement info see Legacy replacements
Can the stores be categorized by more than one taxonomy? Not multiple tags in a single taxonomy, but multiple tags from multiple taxonomies?
A: Stores only have one categorization class – the store page taxonomy.
However, WordPress Taxonomies are hierarchical. Therefore, you are able to assign all the attributes you need to your locations and use the parents of the branches to drive the user experience. The Power add-on has several UX components such as “drill down” menus that allow users to select a specific category by selecting a parent first then a child.
Note This page does not apply to our SLP SaaS subscription customers. All updates for those customers are taken care of by us. SLP SaaS is also referred to as MySLP. It is not a plug-in. It is a managed Software service. No need to worry what version you are on.
All add-on packs are available from the WordPressStore Locator Plus website. Power Add-On , Experience Add-on , or you can purchase a Premier Subscription that provides access to all of the add-on packs as well as preferred access to the Premier support forums, pre-release products, new features and functionality that is available only to subscribers.
Note: If you purchase the Power or Experience add-ons as an upgrade to your existing (Legacy) add-ons, the legacy add-ons will automatically be deactivated. Delete the legacy add-ons. First “always have a full backup of your site” We strongly recommend looking into the WordPress backup, or Jet Pack. One of the features included , besides real-time incremental backups of your site with restore points, is the ability to restore the site to an alternate site
<!–more–>
SLP version 5.10 and above are not listed in the WordPress Plugin Directory. Ditto any add-ons you purchased from our Store front . As such the first time you add the plug-in it will need to be installed via the below installation process.
Once installed a query from the WordPress Admin Panel communicates with the Store Locator Plus servers and a message or red line will be shown as updates are available. Occasionally, the WP server times out before it gets to the SLP plugin servers. Use the check again tool in the WP Admin sidebar or check the versions at the Store Locator Plus home page.

Some third-party plugins and WordPress themes can prevent the update notice appearing from the Store Locator Plus server. It is prudent to visit the Versions Page and only if necessary, perform a manual update.
You should perform updates on your test site or a staging site first to avoid downtime or potential issues effecting your production (live) site. You should always have a recent back-up to restore to. The safest way to do manual updates, follow these steps
Deactivate the plugin you are updating
Delete the plugin
Go to Plugins | Add New
Select Upload
Upload the latest release zip file
DO NOT click the Activate button
Go to Plugins on the sidebar
Check off the plugin you just installed
Go to bulk actions and select activate
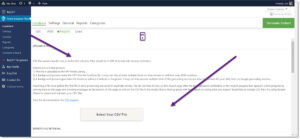
Location Imports are handled via a CSV file for users that signed up for the MySLP Professional SaaS service or are using the WPSLP Power Add On with Store Locator Plus plug-in for Word Press current version. With MYSLP the import feature is under the StoreLocatorPlus sidebar/locations as shown in screenshot. If you are using WPSLP self managed and have the Power add-on it will look similar.
Getting the proper CSV format can be a challenge when using spreadsheet apps like Excel or Numbers. Here are some tips to getting a valid CSV format out of a spreadsheet app:
Check out the Example CSV Imports post to get some usable import files you can play with.