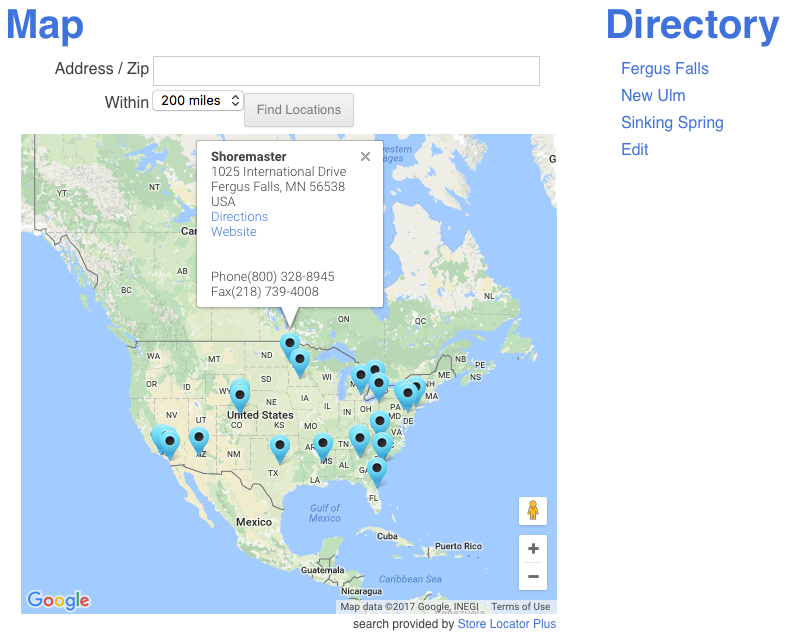
Territory Bounds module was moved from the General | Data tab to the General | Server | Web App Settings section. Cluster Map Markers is useful for a large dataset in close proximity to each other on the map.
URL Control
A URL Control module was been added to the application for Enterprise or premier subscribers. Enabling this module will turn on the interface to allow additional data to be presented in a web page URL to impact how the locator behaves.
URL Control : Allow Location In URL
The first URL Control option is to pass a location ID in via a URL. Adding ?location=<id> to the end of a web page address that hosts the locator will cause the page to load with the specified location being highlighted as if the map marker was clicked. The default behavior is to show the info bubble for that location.
When the URL Control module is active you can enable location ID passing by turning on “Location Selection” under the General / User Interface tab.
When this is enabled you can pass in a location ID by adding ?location=<id> to the end of the page address where your locator map is deployed with the [slplus] shortcode.
When the location ID is present and the settings is enabled the specified location will be activated on the location map as if a user had clicked the marker on the map. This will show the info bubble by default.
Note:If cluster map markers are enabled they will be turned off for the initial page load. Subsequent input or searches by the user will re-activate the cluster map markers.
Note: When passing in a location ID via a URL the location latitude/longitude will become the center point for the map display. The location that is shown will be at the top of the result listing if sort by distance (default) is in place.
Location Limit
When the URL Control module is active you can enable location ID passing by turning on “Location Limit” under the General / User Interface tab.
When this is enabled you can pass in a limit for the number of locations to be returned when the map initially loads and when a search is performed by adding ?limit=<id> to the end of the page address where your locator map is deployed with the [slplus] shortcode.
Filter By Tag
When the URL Control module is active you can filter locations to show only this matching the tag(s) by turning on “Filter By Tag” under the General / User Interface tab.
This setting will require the Power Add On to be installed and active.
This setting will also require the following shortcode to be present in the Results Layout. The shortcode is standard in most Store Locator Plus provided Style Gallery Styles. It can be removed or changed if you have the Experience Add On active.
[slp_search_element selector_with_label="tag"]
An example of a Results Layout where locations are assigned a single tag. With multiple tags the entire list will be hyperlinked and will not likely perform as expected. Note the [slp_location data.sl_tags] takes the place of the [slp_location pro_tags] shortcode that is set by default on most Style Gallery styles.
If you have URL controls enabled you can now pass in location filters based on a tag by adding ?only_with_tag=red to the end of your locations page URL.
Combining URL Options
You can combine the URL control options by using standard URL notation for parameter passing.
The standard is to define the first parameter by starting with a question mark.
Additional parameters are started with an ampersand.
To pass a location ID and a location limit, in this example to show ONLY the location specified, you would add ?location=32&limit=1 to your map page URL.
The Premier Add On allows you to set a scheduled interval using the built-in WordPress Cron scheduler to calculate the initial distance for locations where the distance is zero.
The initial distance setting is used by Store Locator Plus to boost performance when loading the initial map. It uses and SQL index on a numeric value to select a subset of data versus calculating values for potentially thousands of locations and then filtering based on the calculation. For sites with more than 1,000 locations this feature significantly boosts initial map loading performance.
All those little location markers on the map that Google just made FAR more prevalent in their latest update? Those are what they call map icons. They are also clickable which means all those locations will pop up a map bubble even if they are not YOUR Locations for your business. Premier Add On v 4.7.1 or higher for Store Locator Plus or MySLP/Enterprise lets you disable the “clickability” on the map icons.
The Premier Add On includes an option to run location geocoding on a regularly scheduled interval. This can be useful for a hands-off approach when loading locations remotely through direct data connections.
Additional Results Interaction features are available with the MySLP/Enterprise or WPSLP Premier Add On. The results interaction set of features provides a variety of visual cues on the location map to indicate the location a user has clicked when viewing a list of locations., providing a variety of additional options beyond the standard Info Bubble that Store Locator Plus displays when a location is clicked.
Use the Experience add-on to completely disable the Info Bubble under the map and only use these interactive result indicators. When a visitor to your site clicks on the results marker they will see additional information such as description you have entered for that location, in addition to the fields that are populated for the location.
Info bubble turned off, marker clicked shows the additional info for that location
If you have the Poweradd on for WordPress or the Power / Professional / Enterprise level for MySLP you will see a header tab in your Store Locator Plus menu labeled Categories. This is where you can establish and manage settings and determine the categories you want to add within the form section of the user interface.
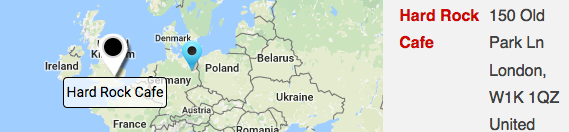
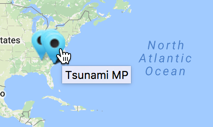
Map Marker Tooltip is a feature available to SLP Saas Enterprise level or WPSLP Premier Subscribers. The tooltip turns the map marker tool tips on and off. When on, the short name of the location appears when the the user hovers over the location marker.
Map Marker tooltips appear when a user hovers over a map marker.
You can easily create lists of the cities, states, or countries where you have locations by using the slp_directory shortcode provided by the Power add-on. Premier Subscription members can install the Premier Plugin to further extend the functionality of the slp_directory shortcode.
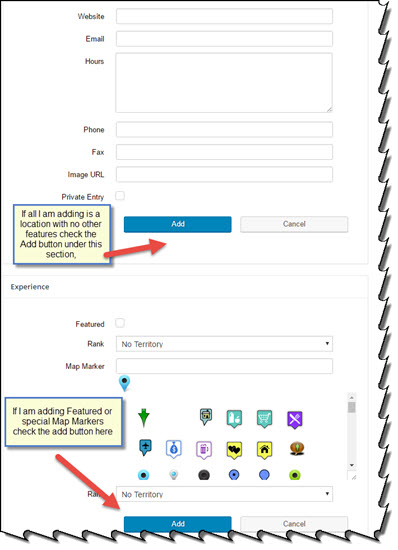
If you have any of the Store Locator Plus featured Add-ons such as Power, Experience, or Premier add-ons , or if you have the MySLP Saas Professional or Enterprise level plan you will see additional sections when Adding (or managing) a Location.
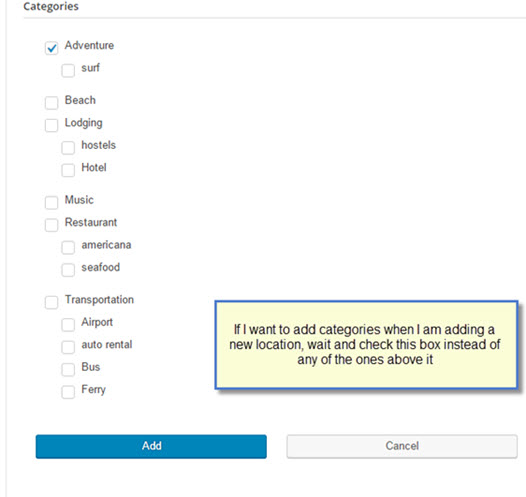
You can opt to fill in all the rows and info that determine the Location and geocoding and hit Add button if you are done entering information. Or you can opt to continue to the next section, whether it be featured, tags, categories, or other functions that are in separate sections on the Location Add Tab.Click the “Add button” at the bottom of the next section instead.
For example, I want to add a location that also is going to have a category assigned to it. I have the latest version of the Power Add-on activated. After adding all the Location information, I do not click on the Add button under the location information but continue on down to the next section called “Power” and add whatever pertinent information I wish to add there. Once I am satisfied and have no additional data to add, I click on the Add Button under the Power section of the Locations Panel to create the location that I have just added.
The category or other additional data you just associated will appear when you review the Locations Page.