Location Results Report

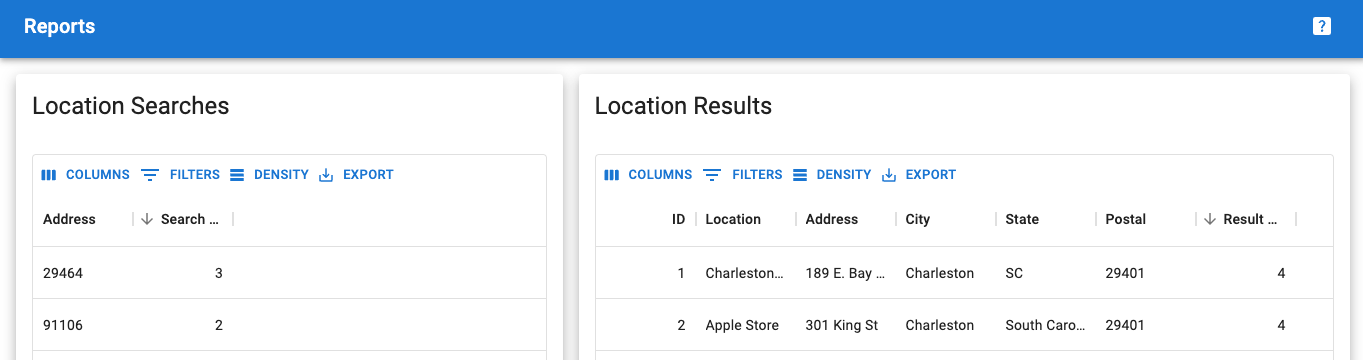
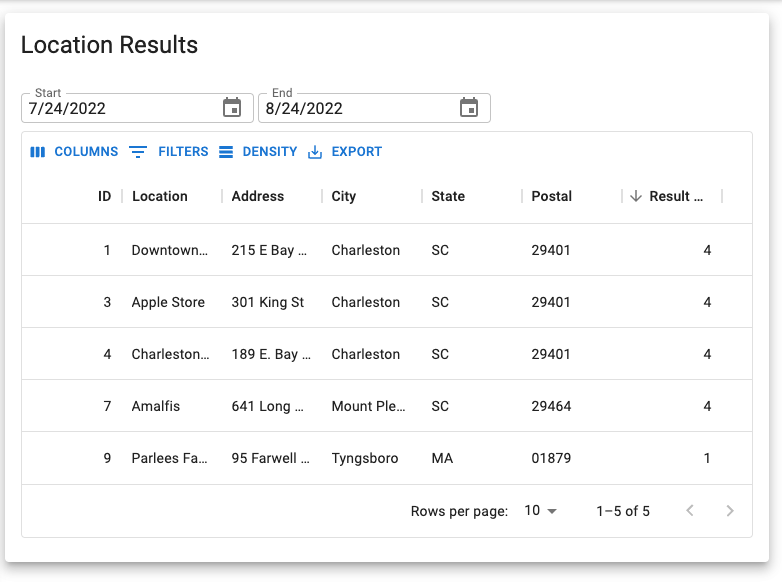
Location Results reports are included with the Professional or Enterprise plan. This report is designed to show the locations that were returned by users entering addresses on the search form when looking for locations. This can be useful for determining which locations are appearing most frequently for your site visitors.

To view this report you’ll need to turn on reporting features as outlined in the Reports documentation.

Location Results Report 2208.15+

This report will show up to the top 500 locations returned within the date range selected.

Location Search Report

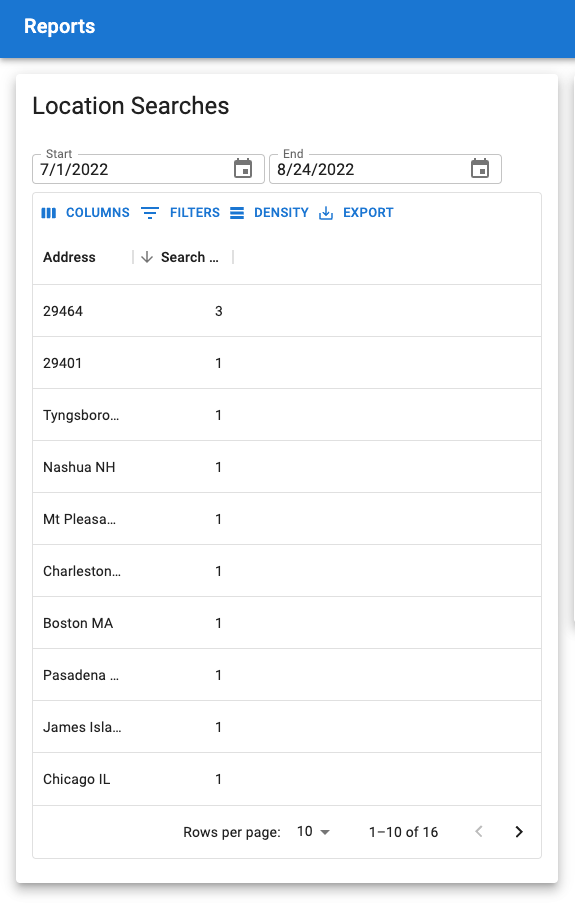
Location Search reports are included with the Professional or Enterprise plan. This report is designed to show what addresses users are entering on the search form when looking for locations. This can be useful for determining areas where your site visitors are looking for your product or service.

To view this report you’ll need to turn on reporting features as outlined in the Reports documentation.

Location Search Report v2208.15+

This report will show up to the top 500 searches within the date range selected.

How To : Location Categories

Assumptions

WordPress environment is setup and configured including activation of the following plugins

  • Store Locator Plus®
  • SLP Power add on

In addition map service (Google API keys) should be in place and some locations should be added to the system.

A page has been created with the [slplus] shortcode present and the map is rendering properly.

Users are logged in as a WordPress administrator (the process will be slightly different for SaaS users).

Adding Categories To Locations

Objective

Create a location category and attach it to an existing location.

User Action: Add A Location Category

  1. Click on Store Locator Plus® | Categories in the WordPress sidebar menu.
  2. In the left “Add New Category Form”…
    1. Type a category name. (Restaurant)
    2. Click Add New Category
Result

The new category should appear on the category list on the page.

Category list after adding the restaurant category.

User Action: Attach Category To Location

  1. Click on Store Locator Plus® | Locations in the WordPress sidebar menu.
  2. Click the Edit action icon on the first location.
  3. Check off the box next to “Restaurants” in the Power | Categories section of the form.
  4. Click Save.
Result

The category is assigned to the location and appears on the location table.

The location with an assigned restaurant category. This view is showing fewer columns as the Screen Options was updated to removed unused columns from the table view.

User Action: Show Category Select On Front End

  1. Click on Store Locator Plus® | Settings in the WordPress sidebar menu.
  2. Change the Category Selector setting to “Single Drop Down”.
  3. Click Save
  4. On the front end, go to the page that has the [slplus] shortcode.
Result

The search form for the map should show a category drop down.

The front end page with the [slplus] shortcode, showing the category selection filter.

User Action : Filtering Locations With Category

  1. On the front end, go to the page that has the [slplus] shortcode.
  2. Enter an address, choose a category.
  3. Click “Find Locations”.

Upgrading Store Locator Plus

The base Store Locator Plus plugin and add ons are updated on a regular basis.  Often the updates include security and bug fixes or fundamental changes that are designed to improve performance by reducing the memory and/or disk request load when your visitors are interacting with the map.

The most common reason your legacy add on stopped working is because it is no longer supported with the latest version of Store Locator Plus  or vice versa

You may wish to choose to stay with your WPSLP Self Managed plugin and upgrade to the replacement bundled  add-ons or switch to  the managed MySLP.

Make sure you have a backup copy of the current version of SLP you have installed that IS working with your  add on packs. We ALWAYS recommend that your site uses VaultPress or JetPack

Whenever you update the base plugin make sure ALL of  your SLP add-on packs are updated to the latest version.

Where to find the Store Locator Plus for WordPress Plug-in versions and updates

WordPress Plug-in Log-in

For the WordPress SLP stand alone (do it yourself) plug-in , the latest update to the Word Press base plugin normally appears in your WordPress site Plugin menu for auto update

To check your version against what is currently available  please see the site home page under Support/Versions

The WordPress Store Locator Plus base plug-in is again available in the WordPress plug-in directory.    If you purchased an add-on  you will  need to log into your WPSLP account and download it manually the first time you use it.

ALWAYS BACK-UP your site immediately  before updating any Plug-ins.

How to manually update.

Most Common “What Should I Buy” Questions

Some of the most common features requested are included with either the Plug-in for WordPress using add-ons OR a higher level plan if you use the all inclusive (but separate from the plug-in) Store Locator Plus Software as a Service (SaaS)

MySLP to WPSLP Comparison

Advanced is comparable to the basic Store Locator Plus plugin.

Professional is the Power level (excluding SEO Pages) plus the Experience add on.

Enterprise is the Professional level plan plus the Premier subscription features, functionality  and  support services.

Read below for answers to these questions and check out our other “What To Buy” articles.

Categorical Location Markers

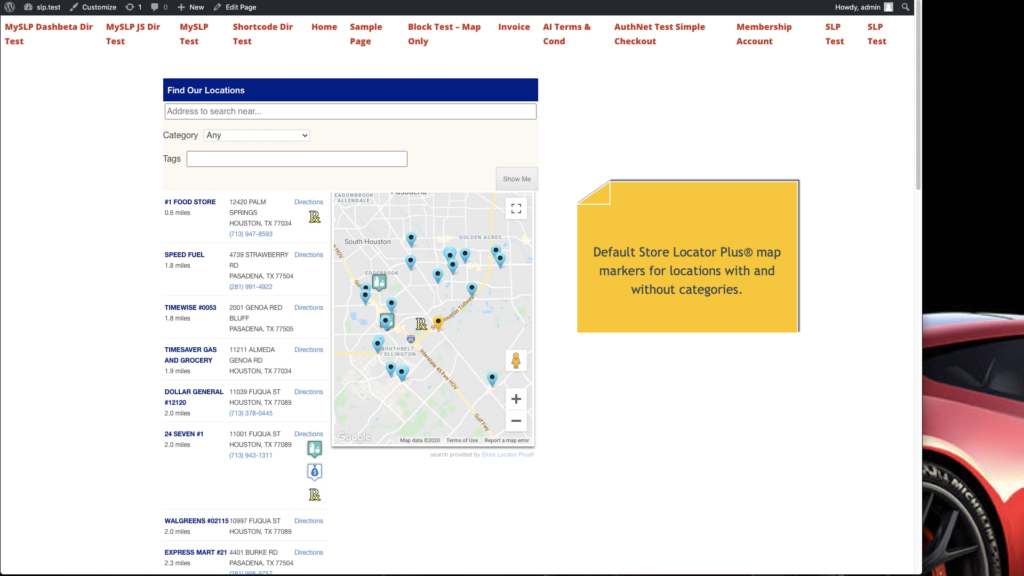
MySLP Professional and Enterprise level services allow for locations to be categorized. Each category for a location can have its own map marker associated with the category. These markers are then displayed on the map to mark the location. (This also applies for those customers using the WordPress SLP plug-in with the Power add-on or Premier)

However, some locations may belong to more than one category. In this case the map marker that is selected to be displayed on the map is determined by the RANK assigned to the category. If multiple categories have the same rank, or no rank, then the first category by alphabetical listing will be the one selected as the “main” category for rendering the map marker.

Default map markers when no category is selected.

Filtering Locations By Category

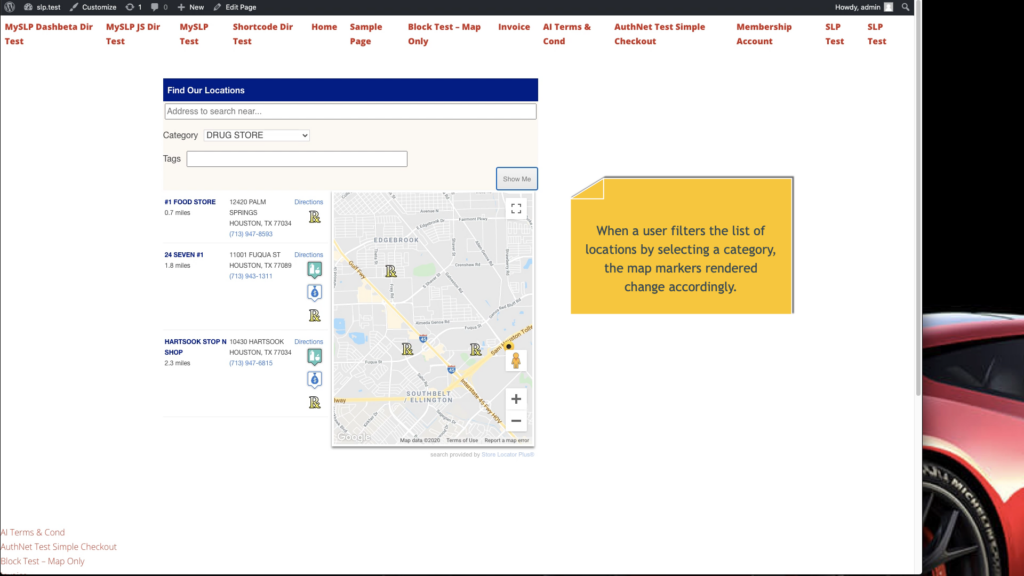
What happens when a user decides to filter the list of categories? Only locations that are within the selected category are shown.

If the location only belongs to ONE category, as is the case for the “#1 Food Store” in our example above, the choice is easy. Show the category map marker.

But what should be displayed if a location belongs to several categories, as is the case for our “24 Seven #1” location shown in the example above?

Prior to our mid-September 2020 release of Store Locator Plus® (or the Power 5.5.7 add on for our legacy WordPress plugin users), the marker for the “24 Seven #1” location would be the highest ranked category, which is the convenience store marker.

With the mid-September 2020 release, however, this behavior has changed. The map marker displayed will be the one that matches the filter the user selected.

Since our mid-September 2020 release, category filters change the map markers to match.

Multiple Location Categories

What about Store Locator Plus® interfaces that allow users to select more than one category, such as interfaces that allow checkbox selections for categories? Markers will be chosen from the markers for the selected categories only. If a location matches 2 or more of the categories, the highest ranked OF THOSE SELECTED will be displayed on the map.

This is different from earlier versions of Store Locator Plus® where it would always display the highest ranked category map marker, even if it was not part of the checked list of categories.

Map Settings for Store Locator Plus®

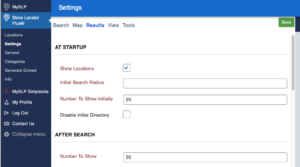
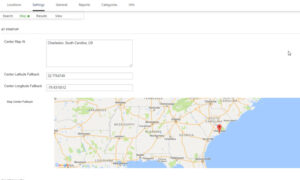
Under the menu for SLP / Settings /Map  :

The settings contained in the map panel will change the functionality of the map domain, center map, zoom and appearance.

The following settings are available to manage functionality for both WPSLP stand alone plug-in and MySLP SaaS managed service..

At Startup

  • Center Map:   This is where you enter an address, or a state, or a location or  a specific latitude and longitude to be displayed as the initial focus for the Map.   If nothing is entered in this box , the default will be the center of the United States .   Google map has determined the center of  United States to  be somewhere in Kansas.  Example:  See Google Localizing the Map:  The geocodes “Toledo” based on the default region (US) to “Toledo, Ohio”  or  one which biases results based on a region set to ES (Spain) to “Toledo, Spain.
  • Center Latitude Fallback: Center Longitude Fallback:  These are the latitude/longitude settings  that will be called if the Google server is “busy” or offline and not able to geocode or “call” to load your locations.  If you reset to blank it will fill in with the Center latitude/longitude of the map domain you have chosen.    You can have a different Lat/long fallback  then your map domain or center map if you  choose.    An image of your fallback will  be displayed

Deploying MySLP :WIX

Adding a Store Locator Plus location finder to your Wix site is easy thanks to their HTML Code embed widget.    Follow these steps to get started.

Create A MySLP Account

Sign up for one of the several MySLP account options available.

ADVANCED

$5/month

  • 125 Locations
  • 1,000 Map Views
  • Extra map views billed at $2/200 views
  • Basic locator styling

PROFESSIONAL

$35/month

  • 5,000 Locations
  • 5,000 Map Views
  • Extra map views billed at $5/1000 views
  • Unlimited Categories
  • GPS Location Sensor
  • CSV import and export
  • Full control over search form and results layout
  • Map color scheme and element styling
  • Feature locations
  • Directory listings

ENTERPRISE

$55/month

  • 15,000 Locations
  • 8,000 Map Views
  • Extra map views billed at $5/1000 views
  • Unlimited Categories
  • GPS Location Sensor
  • CSV import and export
  • Full control over search form and results layout
  • Map color scheme and element styling
  • Feature locations
  • Directory listings
  • Scheduled CSV Imports
  • Advanced Reporting
  • Territories
  • Cluster Map Markers

Selected PlanEmailPasswordGoodFirst NameLast NameGET PROFESSIONAL FOR $35

Add Some Locations

Log in to your MySLP account and add some locations or use the import feature (for Power or higher level accounts) to add dozens of locations at one time.

Generate Your Embed Code

After you have loaded your locations, click Generate Embed on the top right of the page.

Click “Copy To Clipboard” button once the Generate Embed page is up.

Create Your Wix Site

Go through the process of getting your Wix site started.   They have free accounts and advanced premium accounts available.

Add A Location Page

Go to the top menu bar when you are in edit mode on your Wix site.       Select the “Add Page” menu option and give it a simple name like “Locations”.

Add An Embed Block

After the page is added go the left sidebar in Wix and click on the Plus symbol to add a content block.

Look for the More entry on the bottom of the list and click it.

Choose the HTML Code option on the top of the slide-out panel that appears.

Drag the box and drop it on your page.

Add The MySLP Code

Click on the “Edit Code” button that appears above the HTML Code box.

Select “Code” from the Wix radio buttons listed.

Paste the entire contents of the MySLP Embed Code box you copied earlier from your MySLP login.

Click the Wix “Update” button.

Within a few seconds you should see the MySLP map and locations interface appear in the box.

Resize the box by grabbing the “handles” and dragging it to the edges of your Wix content area.   Make it tall enough to show the search form, map, and results below the map.

Publish

On the top right of the page click Publish.

Done

When you publish the site you will have a new locations page with your MySLP map.  It will be a URL like our  https://icecream393.wixsite.com/best-sc-ice-cream example.