This page /information does not apply to SLP SaaS. This information is provided for the SLP do it yourself plug-in only
WPSLP Power add-on uses the built-in file up-loader provided by WordPress Core instead of a custom file import script. Look in the Media Library in WordPress. Make sure your install has not disabled the default WordPress media up-loader.
NOTE: As of July 2018, if you are using the WPSLP “do it yourself” plugin with Power add-on and you have not included the latitude and longitude and require geocoding , make sure you have a Google API account and have checked off the Maps and Geocoding APIs in your library.
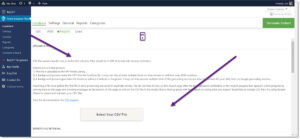
What to look for when importing
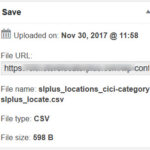
Do you see the CSV file you just imported? If not then your site has disabled the WordPress media uploader.
If your file IS in the media library but never gets past the offset “0” setting check to make sure your server has not disabled the WordPress Cron .
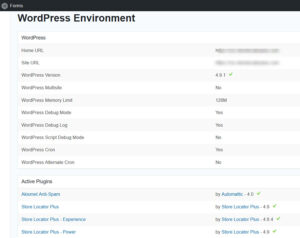
Check to see if your server is preventing the wp-cron.php from being triggered.
Check your import file in the media library by clicking on it. It should show what the file size is and the current offset. The offset is where the background process is shown while importing the file. If it is shown as “zero” then your WordPress Uploads directory for the media library has been set to non-standard restricted access meaning the background location import process is not allowed to open the file after it was uploaded.