To create a locator page that has a zip/postal code search box, a map of your locations, and the results list put the [slplus] shortcode on a page or post.
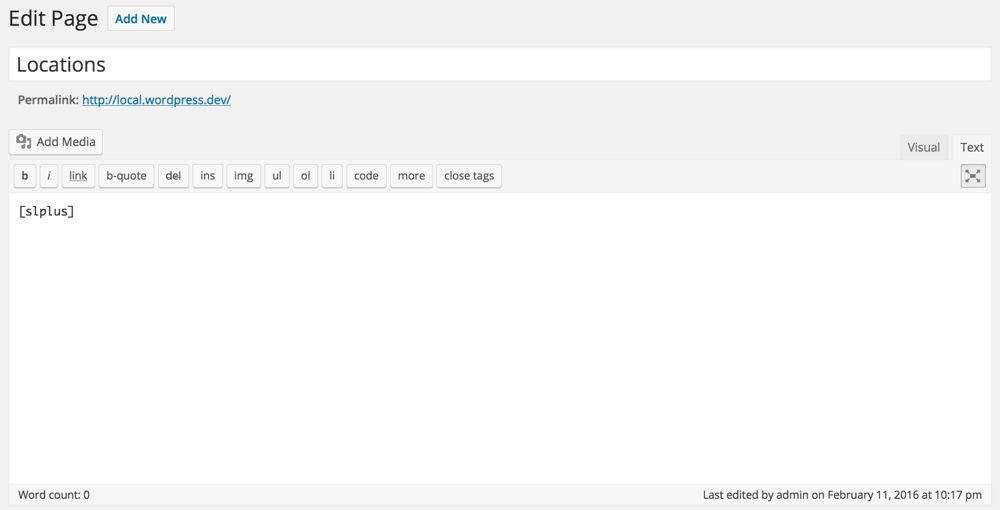
Go to Pages in your WordPress admin.
Create a new page.
Name it “Locations”.
Enter [slplus] in the main content area of the page.
Details
First create a new page for your WordPress site where the Store Locator Plus plug-in will reside. Add the shortcode (a special label inside of square brackets that is used within WordPress pages and posts to display the output from a plugin). You place a shortcode within the text of your page or post and the plugin will “do it’s magic”
Locator Shortcode
To display the Store Locator Plus search form, map, and search results using the defaults you have setup via Map Settings in the admin panel, use the following shortcode:
[slplus]
The base plugin will replace the shortcode with a search form, a Google Map, and a results section below the map. Depending on how you have the plugin configured the map and results may start by showing some or all of your locations.
Hint: Do not copy and paste off this page or all you will see is the text. You must type in the shortcode onto your WP page.
SLP slplus shortcode
Additional Shortcodes can be found under the SLP documentation Shortcodes:SLP